Fall 2015 TAMU Green roof Post 1

This semester I joined the green roof project on top of the Langford Architecture Building. The first time I was up there It looked pretty dim. There were three giant, largely dead walls, and two scraggly squares of roof garden.Despite the situation the other people seemed to have even bigger plans for the project. Now months later lots has changed, and the bigger plans are being achieved. There is another strip of roof garden, filled with vegetables. The scraggly square gardens are both looking much more green, and the walls have been all cleaned off. I have been impressed by how much was accomplished by the small team of people for a couple of hours each week.

As a group, the class has tackled challenges of building and programming an irrigation system, and continually having to cope with their many failures. While the project rolls with these punches I have been able to see that succeeding is not contingent on executing plan A, but instead on learning to work with the problems.

Being responsible for something that is actually happening is the most rewarding aspect of this experience for me. In my other classes or labs, all of the things I did were unimportant, and had no consequence other than my own level of enrichment. Here on the roof I finally have experienced the cliche learning by doing. I have been responsible for planting, counting, building, cutting, programming, and brainstorming things that we need to work in order to accomplish real goals. There are real results and consequences to everything that happens, unlike many of the models or examples I have done in other classes. The way that the group overcomes challenges in order create a successful green roof forces me to stretch myself and learn about a wide variety of things, that all get directly applied to a project. Since the class is really attempting to create something, and not operating in a designed curriculum, I have learned how to deal with the way that the real world affects the project. Sometimes this manifests itself by in the form of unforeseen lessons, such as the time I learned how to use the hand tool to cut PVC pipe. In this project I have experienced more from formulating and working towards our goal, than I did operating in a classroom module.

Fall 2015 Greenroof post #2

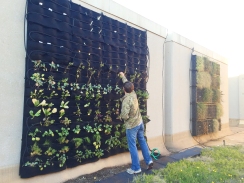
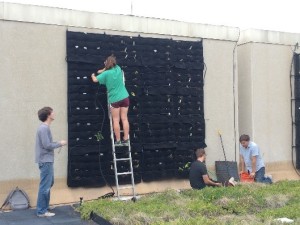
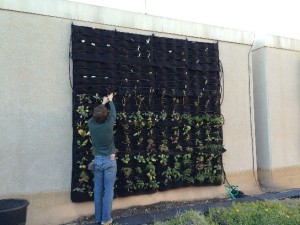
Last week we moved on from the roof garden and its challenges, and began to prepare one of the living walls. We are attempting to bring to life the more unorthodox pocket-based green wall. The wall is made of two giant plastic poster boards, on to which 50 felt pockets each area attached by staples. Right now, there is nothing but dirt wrapped in cloth in the pockets, but in a few month hopefully all the pockets will be filled with green plants wrapped up in their clothes. To help improve this new seasons survival, we are reworking the irrigation system. The previous system was flawed in that it only distributed water directly to 25% of the plants. Usually this would be a great number of plants to directly water, but the unique situation of being a pocket-based green wall create conditions that allow for almost no indirect access to water. Being so, every single pocket on this green wall needed direct access to water being emitted from a hose, but how can we accomplish that? I thought that by weaving a series of soaker hoses through the wall so that every row was watered by alternating hoses would allow each pocket the maximum amount of water. Not a week after brainstorming the idea, we have nearly installed the entire new system. I am looking forward to next weed when we can finally plant the wall. I do wish that we had radishes, because I think that each individual pocket would be well suited to grow individual radishes. I think sometime we ought to try planting some radishes on this wall, because they would be much easier to harvest growing above ground level.

Veggie-apocalypse

Greenroof Post # 3

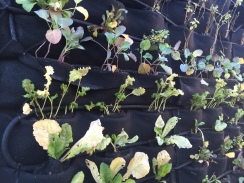
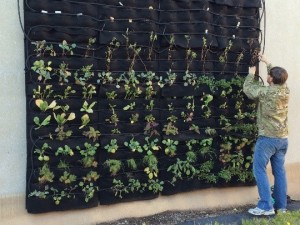
Here at the end we quickly completed the changing out of the irrigation system and planted all of the plants. While I continued to put in the hose, other people would work on the other side of the wall from me and put the plants in the pockets already reached by the hose. Initially we saw all the work as overwhelming, but yet again we were able to make huge progress in just a few hours. Since there is no real standard method for creating a green wall, we all improvised little techniques that would help complete the job better. Working with our limited tools, and shared knowledge I think we quickly learned the trades of hose weaving and plant wrapping. As we mastered our techniques we pushed quickly towards the finish of the semester, where we would have life on every wall and in every garden. I think it was a great experience

transforming the grey squares on the roof into green patches of life, and It was great turning the dry wall into a vibrant garden.

Green Roof Experiential Learning Blog 3

This time we will work on the living wall. The first step is to install irrigation system from the inlet of water. And arrange the irrigation pipes along the upper side of each planting bags on the wall.

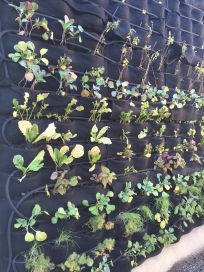
After installation of pipes, we need to take out the existing blankets with old soil inside in the each bag to empty them and wrap the plants with them. Then put the wrapped plants into each bags. Our basic principle of arranging plants is based on theory that short plants on the bottom, tall plants on the upper layer and same plant species are arranged together side by side.

However, the process of putting plants into the bag is really a tough work due to the restricted space provided by bags, which is really difficult to squeeze the plants into such a small space. Also the space above bag is also small which makes the leaves of plants bend outward. So in my opinion, the distance between upper side and lower side bags can be wider.

IMG_8770  IMG_8777IMG_8772

Overall, the green roof internship in this semester is almost done. I really learned a lot from these practical operations of selecting plants, making soil base, planting vegetation and acquire some knowledge about the installation of irrigation system, which would be a greatly valuable experience in my life. I hope this project can be continued in the future.

Green Roof Experiential Learning Blog 2

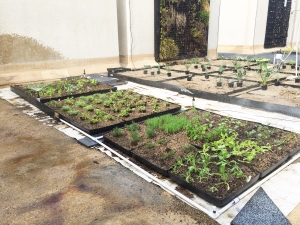
And we also added new nine modules for growing proposed crops. In making the substrate and filling soils in the module, firstly we put a layer of substrate to fill the holes in the modules, and a square blanket was used to cover each modules on the top of substrates. And soils for growing vegetation are put on the top of blankets. The texture of substrate soils is coarse which can contribute to positive drainage within the modules and the texture of topsoil is finer than substrate soil and it is opulent with organic matter and water content.

IMG_7515 IMG_7880

Then the most interesting part came! The transplanted and seed crops arrived, which included Arugula, Chives, Cilantro, Mint, Shallots and so on. Prof. Merrill helped us arrange the layout of different crop species and we took off the outside plastic packings of transplanted crops, burying the roots under the topsoil. Talking about the most difficult part, I think it is to install the irrigation system. I didn’t participate in that part, but I saw my teammates tried to connect the pipe with water source, cut the pipe according to the dimensions of modules, used nodes to connect pipes with chemical glues. Finally, four irrigation nozzles were set up around the crop modules. The nozzle radius is suitable for the site, but one full-nozzle should be replaced with half-nozzle.

Another type of plants we want to grow is succulent plant. So we also had a discussion about the appropriate species for roof planting and before that we each people had a suggestion list. I proposed 6 succulent plants, and I feel so honored that 4 of them had been chosen for growing on the roof, which include Sedum palmeri, Graptopetalum paraguayense, Opuntia cacanapa ‘Ellisiana’, and Euphorbia resinifera. Many other succulent plants are also proposed, such as Nolina macrocarpa, Hesperaloe parviflora, Sempervivum ‘Carmen’, and Agave colorata x parryi and so on. We spent much time on arranging and distributing them in a well-organized and good visual-effect way. We made the short plants as ground cover distributed around the tall plant in the center. The same species are arranged together forming a group.

IMG_7731 IMG_7732


Green Roof Experiential Learning Blog 1

My name is Chenni Zhu, a third-year MLA student. On the first day we went up to the roof garden, what we were required to do is to remove invasive weeds and pick up mature fruits of some crops such as tomatoes, shallots in the nine modules on the ground. Then we need to weigh the fruits from crops and record the numbers. And I feel what a pity that most of crops grown on the roof in summer are dead for these one or two months. It may be due to the harsh weather which is too hot and dry without frequent precipitation in Texas.

So on the first day, we almost removed all of the weeds in the nine modules. However, what we saw in the next week surprised us that many weeds had grown up again in the modules due to a rain in that week. Thus, we had to weed them again to ensure there is no chance that these weeds would come up again. I have to say that the invasive weeds are really strong and capable of establishing themselves in prevailing conditions without manual intervention, while we should take more care to crops.

After weeding, we were required to discuss what kinds of crops are capable of living on the roof top and surviving well. A study about “Assessing Crop Viability for Agricultural Production on Extensive Green Roofs” provided us with some statistics about which crops are suitable for growing on the roof in Texas. The evidences showed that the strong survivors (80 %+) include Chives, Cilantro, Parsley, Thyme and Mint among transplants. Moreover, among direct seeded crops, strong survivors include Arugula, Garlic, Kale, and Shallots. On the other hand, every team member was required to provide a list of suitable crops for growing on roof. So based on the study and the information I collected, I think the Arugula, Chives, Cilantro, Mint, Shallots and Thyme are ideal crops surviving on the roof. After that, we discussed the final crop species and basic layout of them according to the visual effect of combination of crops, the different demands on water amount of different crops, and numbers of crops.

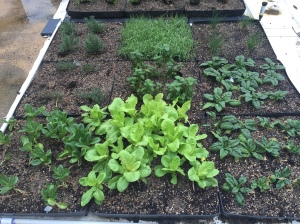
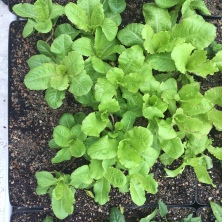
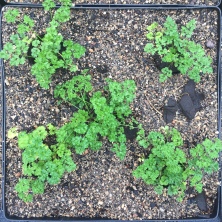
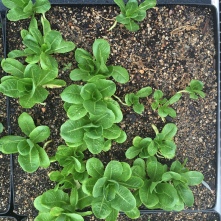
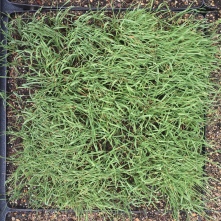
Below shows the later situation of some crops we grew on the roof. Most of them are in a good condition.

IMG_7890 IMG_7889 IMG_7893 IMG_7894

Green Roof Learning Experience – Fall 2015 Blog 3 by Tiantian Lyu

The last process for the green roof work is to grow plants on the wall. Before doing the planting work, our team had a discussion about plants selection. We selected different types of vegetation.

Next step is to layout the irrigation pipe. Each row on the wall needs to have its own irrigation pipe, then the plants on each row can get enough water.

1

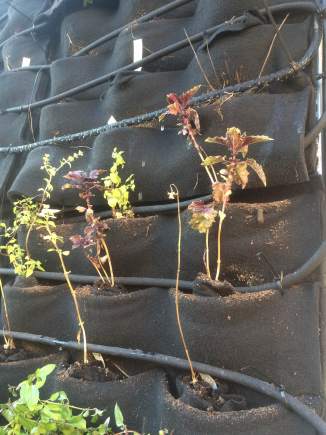
After layout all the pipes on the wall, it is time to grow plants. We planned to grow taller vegetation on the high area of the wall, and grow lower vegetation on the bottom part of the wall. Doing the planting process, we need to clean the dead plants from the planting bed and re-wrapped the new plants, then put the new one on the wall and ensure each plants could get enough water under the irrigation pipe.

2 3

After finishing all the above steps, the walls planting work is done.

Doing this semester’s green roof learning experience, I really learned a lot of practical knowledge, for example, I learned how to layout the irrigation pipe on the wall and on the ground; I learned how to select suitable plants for the green roof; I learned how to grow plants on the roof and so on. It will be a valuable experience for my future development as well.


Green Roof Learning Experience – Fall 2015 Blog 2 by Tiantian Lyu

After we finish the weeding and plant selection process, it is time to plant and layout irrigation pipe. Irrigation is very important for the plants grow healthily on the green roof, because the roof environment is much harsh with less rain.

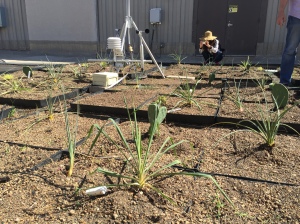
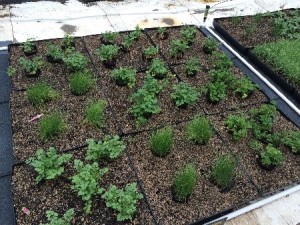
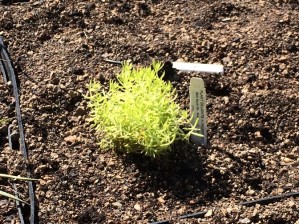
We planted the vegetables in the 9 blocks, each vegetables grow in one block, which is regular and easy to maintain, we also layout the irrigation pipe. Now, they grow well during one week, following are the images show us the condition of  irrigation pipe and vegetables.

34

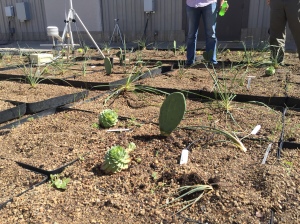
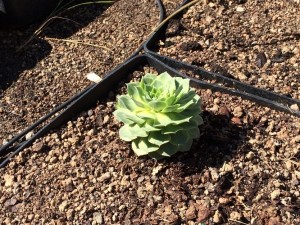
We also planted succulent plant. First we need to think about it, because different plants have different shapes and habitats, it will be a mess if we plant them optionally. We have to think about how to layout them in a good sight and what is the easiest way to maintain them. So we decide to plant the taller ones in the middle of each block, surrounded by some smaller succulent plant, like Mexican Sedum, Ghost Plant and so on. Also we need to plant one species closely instead of planting them disordered, it will make the whole block looks neatly and lively.

4

Every Friday when we go to the green roof, we can see the difference about these plants, I feel very happy to have this opportunity growing green plants by myself, it is a good experience to use what we learned from the class into the real situation.

Green Roof Learning Experience – Fall 2015 Blog 1 by Tiantian Lyu

Since it is not the first time for me to work on the green roof, I am more familiar with the working experience. In the summer 2015, I am lucky to have an opportunity to work on the green roof with Dr.Dvorak, which is the first time that I really understand what green roof really looks like. In the summer time, our major work is to design and layout the plants for living wall, which attracts me a lot and I really learned a lot from that experience.

In the fall, the work is a little bit different. A good growing environment is very important for the plants, the roof is overgrown with the weeds, so we need to do some weeding work first. It is hard to remove all the weeds, especially the smaller ones. After a rainy week, the weeds would grow again if we do not finish this step seriously. We need to know that every step is important for the plants.

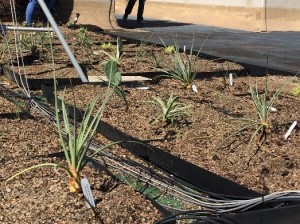
After finish the weeding work, we need to select plants for the green roof. The following plants will be planted on the roof: Beargrass(25), Red Yucca(16), Mexican Sedum(13), Brakelights Red Yucca(12), Houseleek(12), Resin Spurge(8), Spineless Prickly Pear(8), Candelilla(8), Louisiana Yucca(8), Color Guard(4), Ghost Plant(4), Palmer’s Sedum(4), Mescal Ceniza Agave(4), Spider Agave(4). The reason why we choose these plants is that they can survive in the tough environment with more sunshine and less water.

1 2

We also add 9 small blocks for the vegetable grow on the roof, for example, green onion, vanilla and so on. It is the first time for me grow vegetable in the green roof. In China, people always grow vegetables in the greenhouse, which could always provide constant temperature for vegetables and fruits. These vegetables we selected can also survive and grow well in the tough environment. With all these vegetables and plants, the green roof would be more colorful and alive.

Vegetables, Cable Ties, and Hose

November’s goals could not be pursued without Succulent Garden weed control.  A typical rooftop day sees the class split between weeding, collecting inventory/harvest data, or adjusting the irrigation system.  The Vegetable Garden’s rapid growth and lush color presented an image … Continue reading