The Final Plant

As the year wrapped up the green roof was extensively planted. There was a big end of year planting party where we wrapped up the planting for the semester. On the middle living wall many plants were literally wrapped up, in cloth, and placed on the new and improved wall. I hope that the plants survive on the wall, and I think that they have a better opportunity to do so than ever before. A few adjustments were made to the wall to improve it this year, and now more water and sunlight than ever is getting to the plants. This was largely accomplished by trimming a lot of the excess cloth off of the face of the wall. The cloth was absorbing a lot of the irrigation, and then dripping it down onto the ground. The extra cloth also shaded some of the plants, which is especially harmful for a living wall. Since the wall is vertical and opaque the plants only get about half as much sunlight as plants in the ground, and any additional shade only puts plants at a greater disadvantage. In an earlier post I wrote about the current irrigation system’s failure, but it turns out that I spoke too soon. After waiting about 5 minutes I was able to see that the water makes it most of the way down the wall, and every single pod looked to be getting some irrigation.

We also finished providing the roof garden with ground cover, and now it is thickly planted as pictured.

Post #2 Green Roof Remix

On the green roof there were two different sections, One section of pods had been planted as succulent garden and the other section was filled with small brush and grass had been let loose for over a year and formed a “roof prairie”. Just about every plant survived, and this semester every plant was growing. There were even one or two blooms each in the garden, but the succulent garden also had quite a few weeds coming up.  To try to get rid of the weeds permanently we mixed some of the roof prairie modules in with the succulent garden’s modules.IMG_1153 This way the smaller prairie plants would cover all the open ground that the weeds were growing in.

The modules on the roof were a lot heavier than I expected, which made me think about the overall effects of a green roof. These modules were not just heavy with dirt, but they had continued to get heavier because of the amount of water absorbed by each one. Each module’s plants and dirt absorb and retain a pretty significant amount of water. The plant, dirt, and other materials were all measurably heavier than when the modules were first planted and just about all this additional weight comes from water. I have always thought that South Texas could really benefit from more green roofs because of this quality. A single green roof can absorb a large amount of water that would otherwise become runoff, which can significantly decrease an areas risk of flooding. I think that flood prone areas like Houston could use green roof implementation to help lower floodwaters. Obviously that is a big statement to make, but spending time on a green roof and getting familiar with what it is made of has made me really believe in the stated benefits of these roofs. The first time I heard that a green roof can reduce a building’s electrical consumption by 50% I thought it seemed a bit exaggerated. Now I can see from taking apart and carrying these modules that the dirt and plant material is a really substantial barrier, that I am sure provides excellent insulation.IMG_1156

Just the growth of the plants alone is extremely substantial. It was amazing to see how strong and thick the roots of some of the prairie grass became. When we took apart a module we saw that the roots had wrapped so tightly around the bottom of the module that the letters of the manufacturer were imprinted into the roots. These roots also tore multiple holes through a cloth that I couldn’t even cut with scissors. I always thought that grass was kind of puny, but this grass was nothing to mess with. Even though this grass was tough it was definitely struggling to survive on the roof, the grass was more grey looking than green, and the roots wouldn’t have been so concentrated on the bottom if they hadn’t been looking for more water. It is defiantly difficult to find plants that can thrive long term on the roof. Even though the amount of soil in each module is far from insignificant, the roof provides a limit that the ground just doesn’t have.

IMG_1158
This is how we would empty out the modules

After all the experiences of merging the prairie and succulents together, the roof seems to be doing well, and it looks like for the first time that the weeds are outnumbered by the plants we planted.

Post #1 The Living Wall

IMG_1029

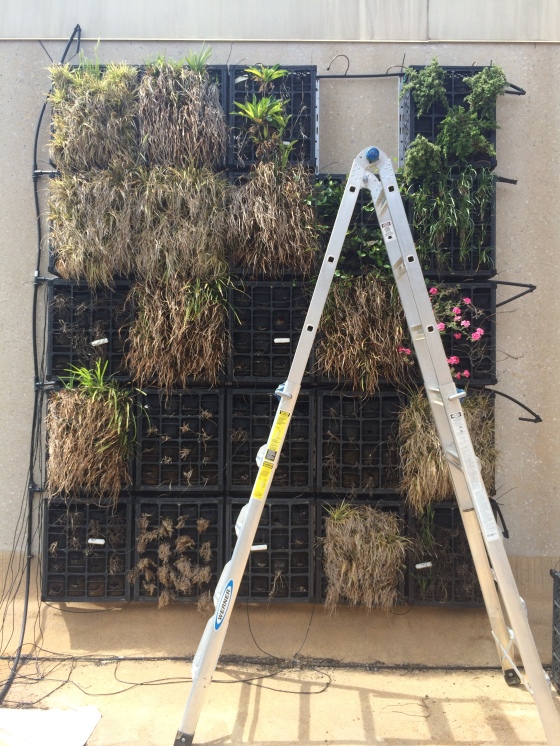
Coming back into the semester the first thing I worked on, other than weeding was on the living wall #2. living wall #2 is needed a new irrigation system, because the old system only distributed water to about 20% of the individual cloth pockets. Right before the end of last semester we installed a new irrigation system using soaker hoses to try to get water into every single pocket. Last semester we did not have enough time to put up the irrigation system well or get all the materials, so the irrigation was haphazardly thrown up.

This semester with more PVC pipe and glue for attaching the pipes to each other we could actually fully install the new irrigation system and make a few adjustments from the failures of the first attempt. We started by taking all the hoses off of the wall, then we built a pipe to bring the water up to the top of the wall. Last semester we connected the hose to the soaker hoses at the bottom of the wall, which required the water to snake up the wall through several hundred feet of hose. As you might expect this was not a good method, and the water was only able to get up about a third of the wall.

After we made the pipe to get the water to the top of the wall, we began to put the hose back on the wall. Last semester for speed we had one person zip tying the hose to the wall starting from the top coming down, and another person starting from the bottom, so we could connect up in the middle. As it turned out there was about 20 extra feet of hose left when the two sides got to the middle, and so we had to attach a second layer of hose onto the wall. This did turn out to make putting plants in that row just about impossible. This semester the we did not have to create punctures in the cloth of the wall, which made things easier, but we made sure to install the hoses from the top down so there would be no doubling back in the hose. We ended up using one less hose because the hose was tight tightly to the wall in the and never doubled back in the interest of space and water flow.

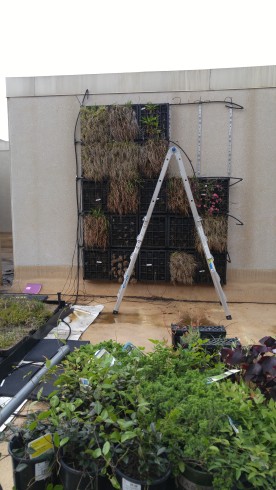
Finally, after building the pipe, and attaching the soaker hoses, we screwed on the attachment joints the to the top end of the soaker hose and hose coming from the irrigation system. Then we got to put in the final step by gluing the pipe to the attachments, linking the wall’s soaker hoses to the irrigation system. Now, we had made a system where the water would be carried up to the top in a pipe and snake downwards crisscrossing the wall with soaker hoses so that water was dropped directly into every pocket.

IMG_1132

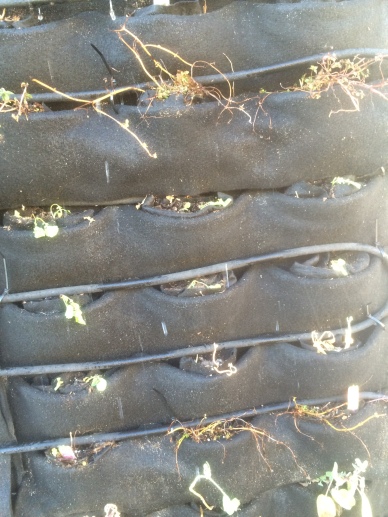
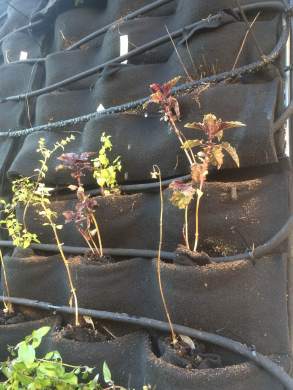
The water does not quite make it to the bottom, but the lower pockets do get some water from  water dripping down from up above, which I tried to show in this picture.

IMG_1131

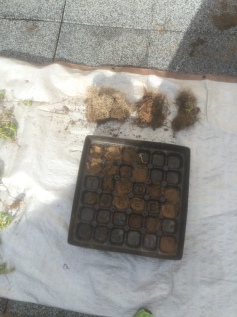
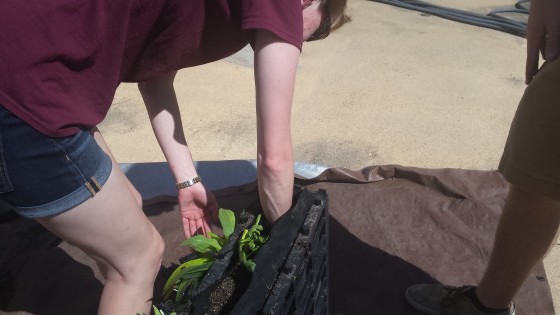
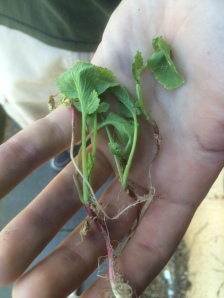
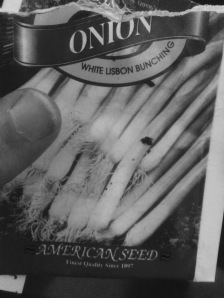
We planted onion seeds, peas, and baby radishes on the wall, but only the peas have grown beyond a sprout.

IMG_1128.JPGFullSizeRender (1).jpg

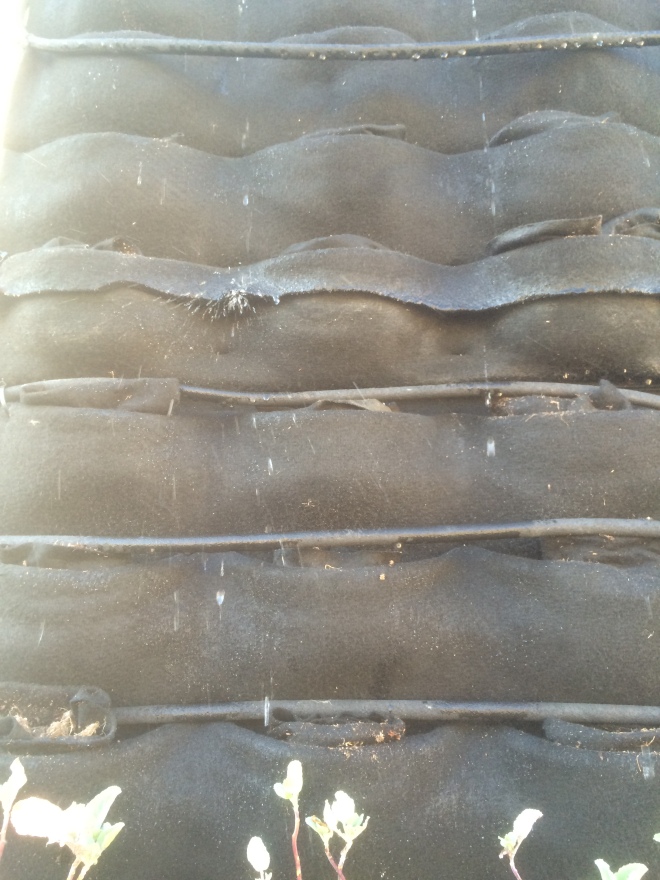
The irrigation system probably needs to have multiple points where water comes off of the main pipe on the side. There are also large swaths of fabric that shade the plants from sun and absorbs much of the water, so unfortunately despite installing a better system it was not good enough to grow plants on this green wall.
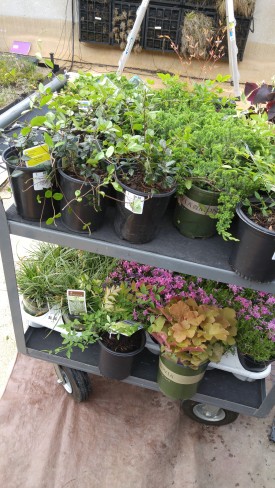
Module Deconstruction

One day on the green roof, early in the semester, we took apart one of the modules on the succulent green roof to look at the root culture of the plants that had stuck around since last year.  It mostly ended up being one spreading succulent and some grass. Taking apart the first module was trial and error. It was difficult, at first, to figure out how to separate the plant roots from the filter fabric. We also had to sift out as much soil as we could to get accurate weight measurements.

At the end of the day, we learned a lot about how to conduct research studies with plants and how to construct a green roof module.

Replanting the Greenwall

These pictures are from the first day we started planting on the living wall. We had brought up this cart of various plants to try out. There was some Asian Jasmine, Shamrock, Bamboo and a few others.

20160401_160240

Before we were able to put new plants in we had to disassemble the old wall, tear out the old plants and collect the old soil for reuse.

20160401_160242

The plants had to be taken out of the pots and the root balls had to be broken up and loosened so that they would fit comfortably in the wall modules. We collected most of the soil from the pots for reuse.

20160401_161113

After we brought all the plants up, took down the old modules and disassembled them and divided up the plants, we only ended up changing out two of the modules that day.

Planting Party 2k16

The planting party last on the morning of May 5th was a whirlwind of planting, pizza. A few more students from the BLA and MLA programs joined us to help us plant hundreds of succulents on the irrigated green roof, felt module green wall and the non-irrigated prairie green roof. I worked on the irrigated green roof, we planted various succulents (mostly sedums)  and marked down where each grouping was placed on the diagram. We tried to pair up plants that would work together aesthetically and not crowd the existing plants out.

This slideshow requires JavaScript.

We checked up on the green wall we had planted previously a few of the plants were looking a little brown, but some of them were doing quite well.

Succulent Search

One day when we could not go onto the roof due to weather, we each researched succulents that we thought would work well on the succulent/xeric roof garden. It was an educational experience, as I really did not know much about succulents beforehand. We were given a list of plants to look up to research their hardiness. These plants included:

Sedum moranense

Sedum reflexum f. cristatum

Sedum stahliis

Sedum corsicum

Sedum praealtum

Sedum moranense subsp. grandiflorum

Sedum kamtschaticum subsp. ellacombianum

Delosperma nubigenum

Delosperma ‘Psfave’

Delosperma ‘Mesa Verde’

Rosularia platyphylla

In addition to these plants, we were to suggest additional succulents to add to the list of potential species that would grow on the roof. Everyone suggested a variety of interesting plants to look up. I suggested Graptosedum ‘Vera Higgins,’ Sedum palmeri, and Sedum potosinum based on their known ability to grow within Central and South Texas.

On a green roof, we learned that there are a variety of different factors that affect the hardiness of plants. The main opposing climatic conditions consist of high heat and humidity during the summer and freezing temperatures in the winter. Previous green roof trials failed to meet an occasional freeze into the lower temperatures. With this in mind, it is important to research plants that can withstand the lower temperatures at least moderately, so that they will not die every few years when the temperature gets that low.

Ultimately, we planted a Delosperma species as well as several other sedums as mentioned in the previous posts. Researching plant species ‘extends the horizons’ and challenges the perception on what a truly defines a green roof. As research continues, more knowledge on the durability of these plants on will increase the variety and frequency of efficient greenroofs in Texas.


Sedum Planting Party

Sedums are the staple green roof plant but they’re not very successful in some areas.  They are great drought tolerant ground covers since they grow fast and there a lot of different shapes and colors.  However, it is said that sedums are not very successful in Texas since some Sedums are not able to withstand the unpredictable Texas weather.  This research will helps us determine weather this is true or not.  We have a lot of different species to test that will help us determine what kind of Sedums survive under the climate conditions in this area.

This slideshow requires JavaScript.

The first step was split up into teams since there were three different areas where we were going to install new plants: the green roof, succulent wall, and succulent roof with no irrigation.  We were given a list with the names and amount of Sedums assigned to our section, which was the green roof with irrigation.  Each module had a plant in center and anything else in the module was growing around it.  The first step was to decide which sedums we want to group together, we started out by selecting three different sedums and placing them in groups of three.  We also had to record where each sedum was planted and how many where planted in each area.  After planting the first group of Sedums we realized that we still had a lot of plugs.  We started planting a lot of them in all of the modules and set aside the design part of this project. The most important part at this point was making sure we recorded where everything was planted.

IMG_0323

Since we planted sedums in different areas of the green roof with different environmental conditions we have a variety of experiments that were started. These sedums will be monitored to determine their success and this could be very important research for the future of green roofs in Texas. Green roofs are becoming very popular not only because of their look but also because this could highly benefit people in urban areas. In big cities where the majority of people live in apartment buildings green roofs could be their only hope for a garden.


Sedums in Texas

Recently, we received a gracious donation of sedums to test their durability on the green roof. Though it is often stated that sedums would not fair well on green roofs in Texas, they have not been given a fair opportunity to prove themselves. In this next leg of research, Prof. Dvorak plans to research the sustainability of these plant materials.

On Friday, we had an end-of-semester planting party (complete with pizza of course!) The students involved in Prof. Dvorak’s green roof class, Dr. Jeremy Merrill,  as well as some additional student volunteers in the landscape architecture program divided up the sedum and perennial species according to their microclimatic and growth needs to distribute to the different gardens on the roof, as well as one of the living walls. Dr. Merrill, Kristal, and I worked on designing and installing the plants in the modules on the Northwest corner of the Langford roof among some of Prof. Dvorak’s previous research is still taking place.

In these modules, some of these plants included:

Sedum spurium ‘Red Carpet’

Sedum ‘Angelina’

Sedum ‘Tricolor’

Sedum ‘Blue Spruce’

Sedum ‘John Creech’

In planting them, we spaced them about 3″-4″ apart and tried to design them in drifts. We tried to make sure that we planted at least three different species in each module with varied heights. We learned how to document  the locations of the plants within the modules to ensure that their progress can be monitored.

These sedums will further be monitored on their ability to withstand humidity and the Texas heat as the summer progresses.

Planting Party

May 5, 2016

Today was the last day on the green roof. With volunteers, we divided into three groups: the xeric modules, the living wall, and the modules on the metal walkway. I worked on the modules on the walkway. We cleared everything in the modules we were going to replant, except for some modules that had succulents that had been growing for years.

After clearing them, we checked the list of the plants that were to be planted there and decided on a planting design.

20160505_101805

A lot of the plants were sedum species, such as Sedum reflexum ‘Blue Spruce’ and Sedum sexangulare. Delosperma nubigenum was also used. After we planted and watered them, we recorded how many of each plant was in each module, excluding the ones we didn’t touch.

After a semester on the green roof, I feel like I learned a lot. I can take apart and put back together a wall module, adjust the water levels, and which plants do well on a green roof. Also that recording information is crucial to see what works and the progress of the roof. I definitely had fun learning all theses things and I hope the plants we planted will last a long time.

Replacing Wall Modules

March 22, 2016

Today we continued to replace plants in the wall modules, inserting new ones into empty modules. Some of the grass on the wall was clipped to make it look nicer.

20160422_151308

The living wall was finished today. The last plants to go in were sedges, which filled in the last two remaining modules.

20160422_16055020160422_160309

After we were done, the water was turned on so we could see which nozzles didn’t work or were letting out too much water for the plants, and to see how the plants were getting water in general. Only two of them didn’t work, but was easily fixed by turning the nozzle to let water run out. We adjusted the ones that put out too much water, which I learned how to do.

20160422_162910


Irrigation, Plant Density, and Weeds

Currently, the main portions of the modular green roof consist of two separate gardens: the succulent/xeric garden, and the prairie garden. At the start of the semester, we began to weed the succulent/xeric portions of the modular green roof. While the plants provide an attractive and native take on a traditional roof garden, (as with most plants) it takes a little while for them to establish. Meanwhile, irrigation provided to establish/maintain the garden as well as the low density of the plantings inevitably invited the weeds.

In addition to crab grass, we pulled a total of 453 weeds. Pictured below are some of the species we removed from the modules:

60

27

IMG_0883

IMG_0882

In addition, there was much cilantro from a previous planting that found its way into several of the modules (81 plants in total).

cilantro

While this is a normal thing to expect for the low density plantings, adding density and lighter irrigation will minimize the weeds in the long term.

On the same day, we seeded several types of succulents and sedums, but many if them did not seem to establish (at least not yet). This being said, we learned that transplanting pre-potted plants or planting plugs is a more reliable way to ensure that new plants flourish. Since then, we have added many more plants to the modules, adding both to the density and appeal of the xeric/succulent garden.

Neverending Weeds

(this happened earlier in the semester when we had just started on the roof)

Before we started planting, we had to do some major weed pulling in the succulent modules. While pulling them, we had to keep a record of the number of each weed we pulled. This excluded the grass, since there was so much of it. Some of them were tricky since they looked similar to the succulents.

It took the whole class to pull and record them. Although recording them took a while, it was important to know that plants could find their way up to the roof and grow there. It was also important to know which plants could grow on their own, even if they were weeds. It was meticulous work, but it paid off and I learned that recording plants, even weeds, is very important and contributes positively to the green roof.

Green Wall

IMG_0073

For our next project we worked on one of the green walls. We had to start out by deciding which modules we had to re-do since some had living plant material  that just needed to be moved or trimmed and the rest were dead. We had a lot of new plant material to work with for the modules being re-done. Bamboo, asian jasmine, phlox, shamrock, and juniper. Next, we had to decide which location of the wall would work for each plant since not all parts of the wall retained the same amount of water.  Not all parts of the wall were under the same climate conditions. The bottom part of the wall had the received less sunlight and retained the most water.  However, the top part of the wall received a lot more sunlight and later we realized the irrigation had not been placed correctly so it didn’t receive as much water.

To change the plants on each module we had to take them down from the wall and remove everything in them. We remove the plants form the modules and poured out the media. We then mixed that media with a scoop of compost and slow-release fertilizer. The first plant to be installed was juniper. At first it was a struggle getting the plant the module since it had a very large root system but after breaking it in half we were able to get it in the module and found an easier way to put the rest inside the module.  This required some teamwork since there were several steps to make sure the plants were placed correctly on the module to avoid them from falling out of the module.

This slideshow requires JavaScript.

Some of the plants only took one week to show the results of how they adapted to their new environment.  Three out of the four Junipers installed dried out even though they were not broken into half like the one that survived.  The Phlox seem to vary since a few dried out and some are still doing pretty well.  The Bamboo and Asian Jasmine are doing great and showed no signs of of stress after being transplanted to the modules, which could indicate that they’ll be successful on the wall.  The final step was to fix the irrigation since not each module was receiving the same amount of water.

In this project I learned about the importance of considering the plants environmental preferences when  it comes to coming up with a design.  We were able to get pretty early results on how some of these plants adapted but that might not necessarily mean that they won’t survive.  A lot of plants go through transplant stress before they completely adapt to their new environmental conditions.